The website uses a system called WP Bakery Page Builder to enable you to manage the content.
It allows you to easily create, move and edit content on the site using a drag-and-drop editor.
CTPL Site and Content Guide
A guide to adding and editing content on the CTPL website
Page Builder
A page is divided into rows, columns, elements and sections. A section contains rows .The rows can be divided up into columns. Inside a column sit elements. Elements include headings, content, images or forms.
A section is used to describe a grouping of columns or rows that have been used to form a layout device such as a contact form or the Explore our Services panel found on the homepage. The page builder allows you to manage the rows, sections, columns and elements.
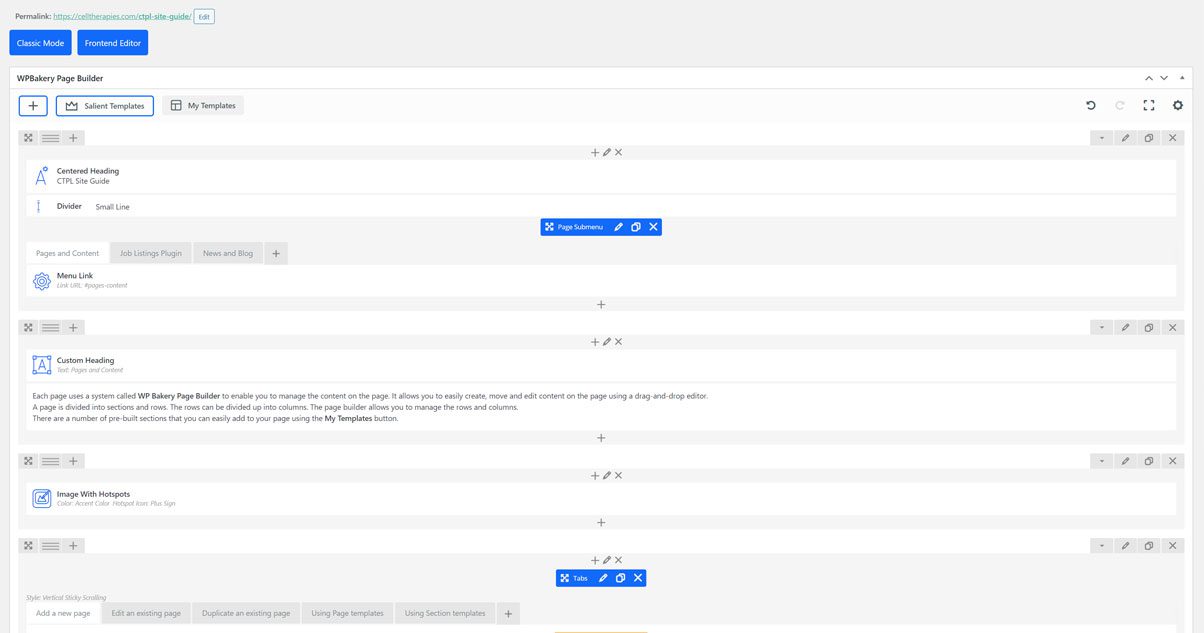
The + Button. Adds a new section, row or item to the page
Import Template sections to match the layout to a page that already exists on the site
The Move Button. Click and drag to move the section around the page.
The pencil brings up all the configuration options for an item
The Column button. Select how many columns a row will have.
The Row editor button.
The Column editor. Change the options for a column, add margin, padding or change the colours.
Rows, Columns and Sections on the front end
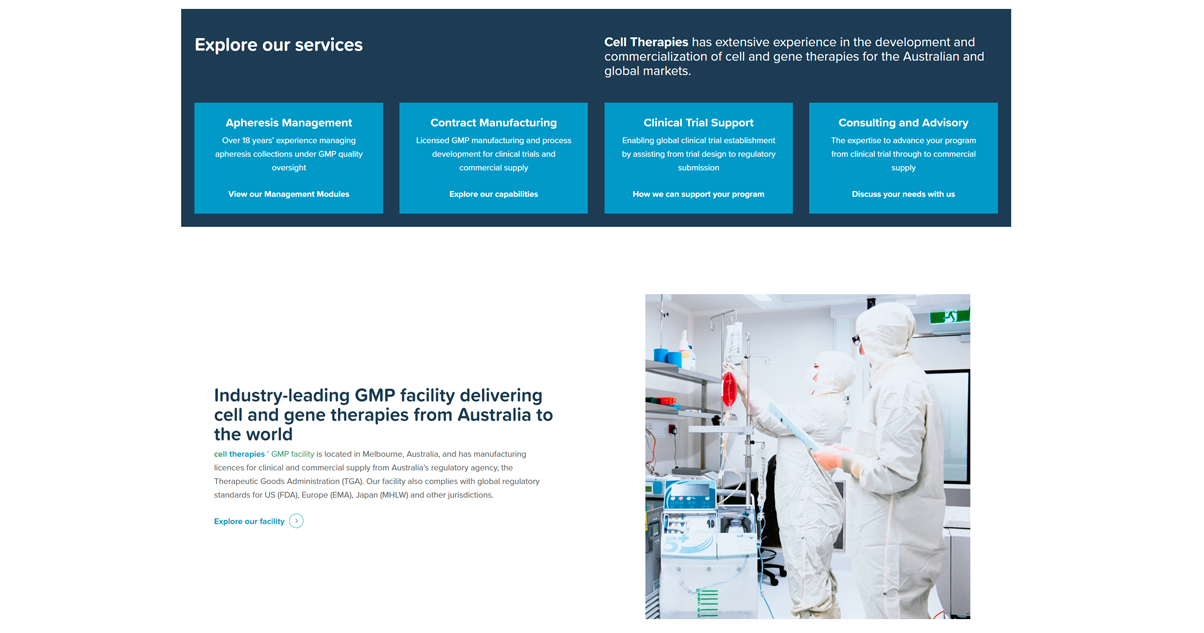
An example of a section on the front end. The section contains two rows, the first row has two columns and the second has four columns.
An Image element
The Heading element
The Content element
Glossary
Category: Allows you to separate articles into themes or categories. Thoughtful categorization allows posts to be grouped with others of similar content and aids in the navigation of a site.
Column: A Row can be divided into columns. These columns can be given different layouts, fonts, colours and sizes inside the row.
Content: Content consists of text, images, or other information shared in posts or pages. This is separate from the structural design of a web site, which provides a framework into which the content is inserted, and the presentation of a site, which involves graphic design.
CMS: Content Management System changes and updates content, rather than the structural or graphic design of a web site.
Draft: The draft post status is for posts which are saved, but as yet unpublished.
Element: An element sits inside the column and can contain headings, content, images, video or a range of other types.
Excerpt: An excerpt is a condensed description of your blog post.
Margin: Creates space around elements, outside of any defined borders
Padding: Used to generate space around an element’s content inside defined borders
Post: A blog post or Article. On this site News Articles are Posts.
Page: A static content page on the site. The Homepage or About pages are examples of a page.
Row: A content holder on the page that can be divided into columns. Backgrounds and colours and widths can be applied to rows.
Section: A grouping of columns or rows that have been used to form a layout device on the page.
Template: A pre-built layout for adding content to pages.
Creating and Editing Pages
How to add a new page.
Adding a page is simple!
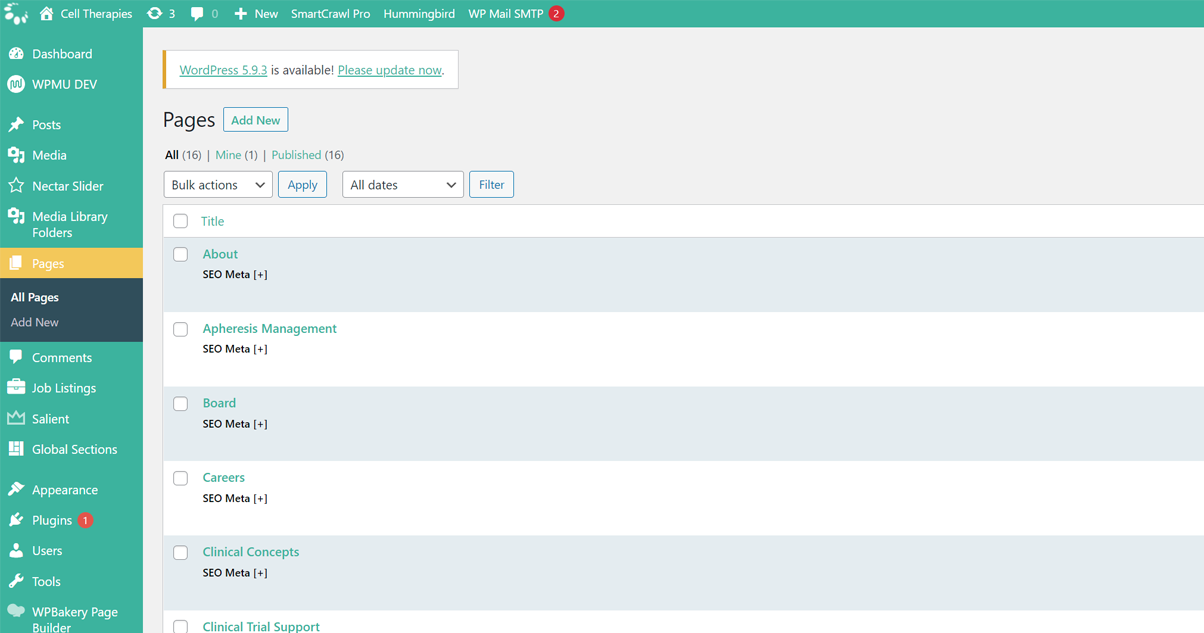
- Go to the Pages > All Pages in the left hand side menu to visit the dashboard.
- Hit the Add New button.
- Add your content and titles to the page and click update.
The Pages Menu. Click ‘Add New’ to create a new page
The ‘Add New’ button can be used when you are in the page list view.
Edit an existing page
- Head to Pages > All Pages to bring up the page list.
- Hover over the page that you want to edit and click the Edit link or the page name.
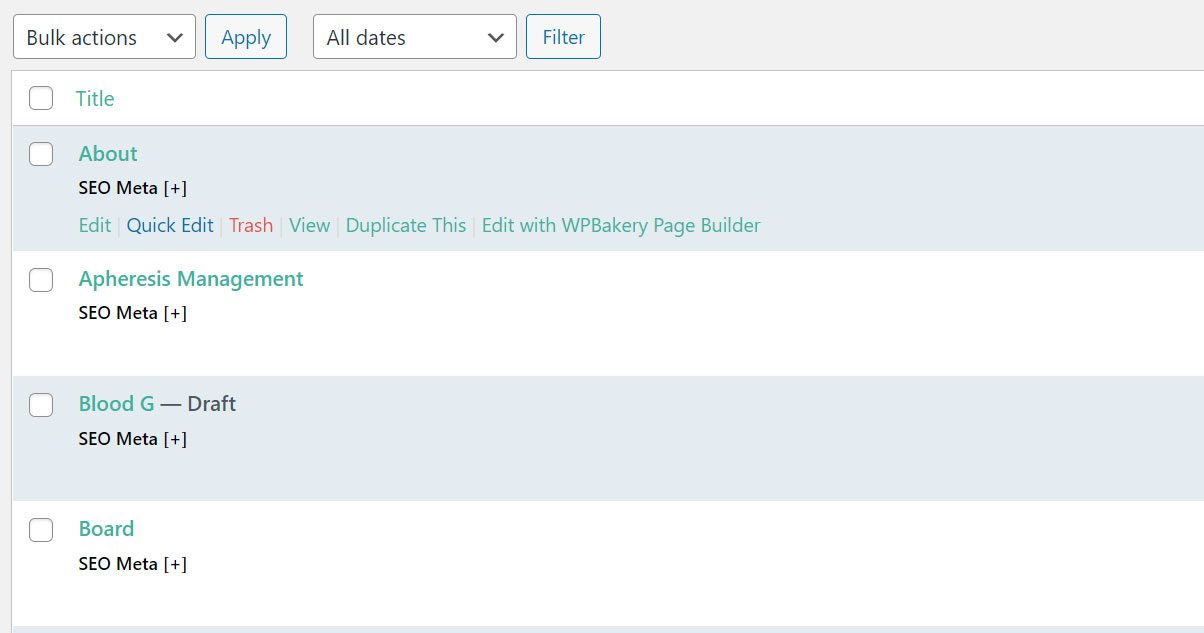
Click on the Edit link when you hover over an page name to open the editor
Click on the page name to open the edit page screen
Use the edit with WP Bakery button to open the front end editor
Use the Duplicate This button to clone an existing page
- Make the required edits to the page
- Press the Update button in the Publish section on the right hand side of the page
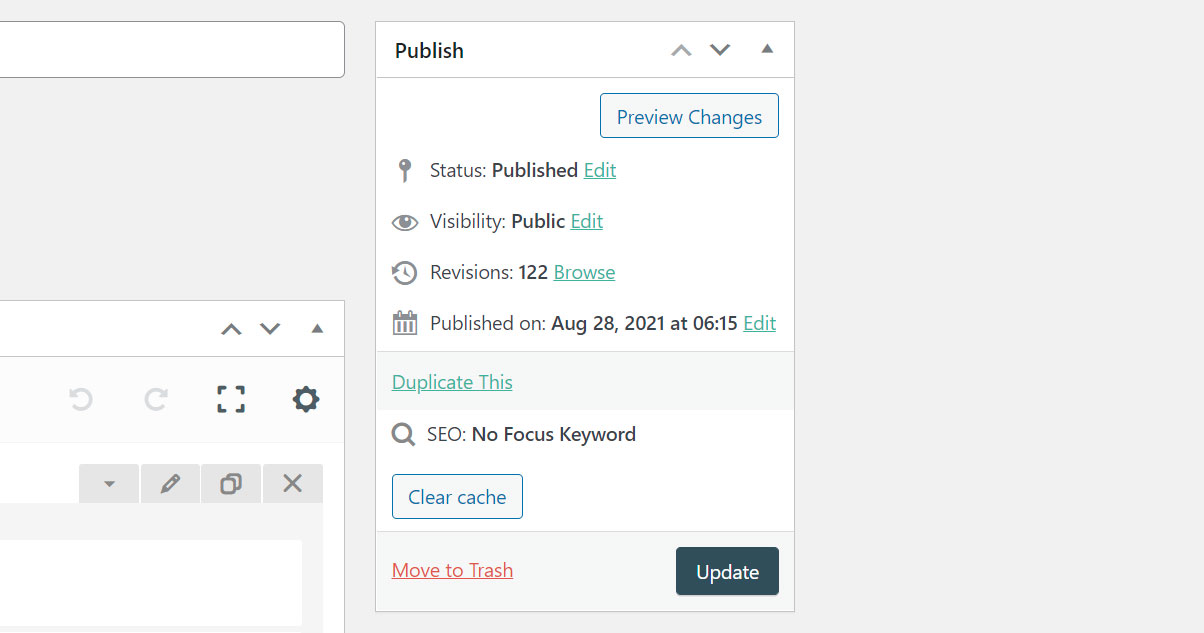
Click the Update button to apply any changes
The Publish section
Duplicate an existing page
- Head to Pages > All Pages to bring up the page list.
- Hover over the page that you want to edit and click the Duplicate This link.
Click the Duplicate This link to create a clone of the listed page
Using page templates
Copy the layout and style of an existing page by importing a template.
- Click on the My Templates button.
- Select Information Page Layout from the list.
- Edit a section by hovering over it and using the pencil icon to edit.
- Remove unwanted rows, columns and items by using the X button on any menu.
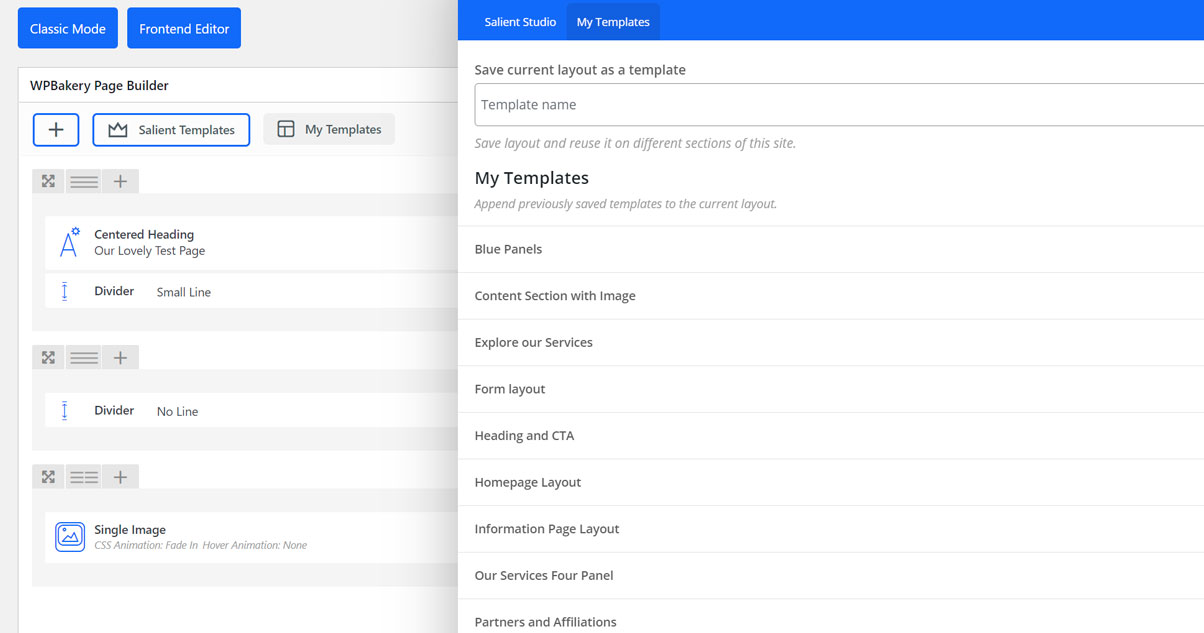
Click the My Templates button
Select the information page layout
Add a new Section from a template
- Click the My Templates button.
- Select a section template from the list.
- Use the move button to drag and drop the item to the desired position.
- Edit the section by using the pencil icon that appears on hover.
Click the My Templates button
Select a section layout from the list.
The Job Listings Plugin
Navigating the Job Listings plugin
- Click on the Job Listings button on the WordPress left side menu to view the Jobs dashboard.
- Add a New Job by using the submenu to bring up the Add Job Screen.
- Create or edit Job Types by using the Job Types selection.
- Manage all Job Listings site-wide settings in the Settings menu.
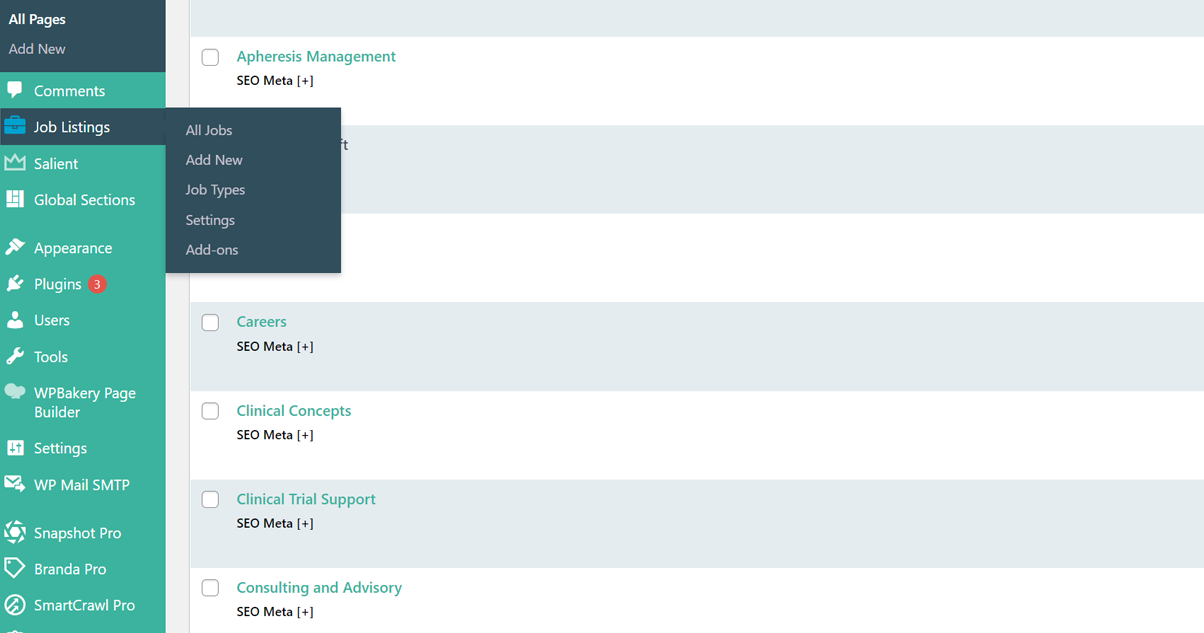
Hover for the job listings menu or click to visit the dashboard.
Add a new job or view all existing jobs from the Job Listings sub-menu
How to add a new job listing
- Give your job a Title and enter a job description into the large text box.
- Select who you would like your applications to go to or enter an external URL if you would prefer to use a job board application form on Seek.com.au or equivalent.
- Add any information that you would like to see on the advert in the Job Data section including an expiry date for the advert.
- Press the Publish button when you are ready to set your advert live.
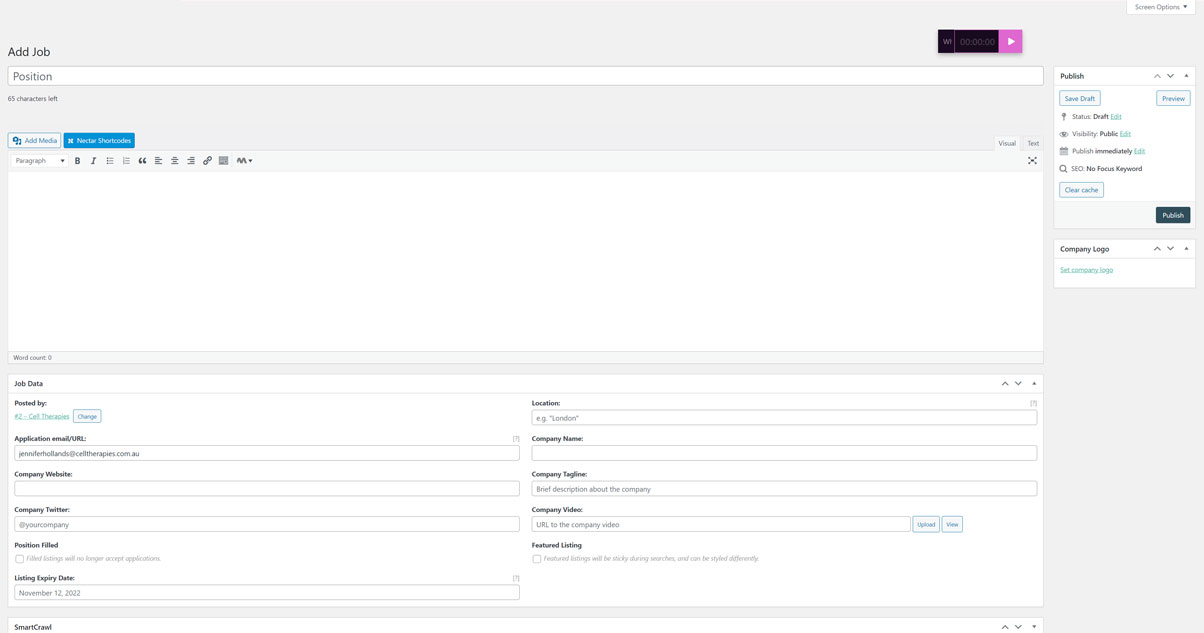
Give the position a title
Enter where you would like the application to go. This can be an email address or a URL of an external form on a site such as Seek.
Press the Publish button to make the job advert live.
Enter a job description into the text box.
Give your listing an expiry date
Edit an existing job listing
- View All Jobs by selecting either Job Listings on the main menu or All Jobs on the Job Listings sub-menu.
- Click on the job you wish to edit in the list of Job Adverts.
- Make any changes and press the Publish button.
Click on the Job listing title to open and edit
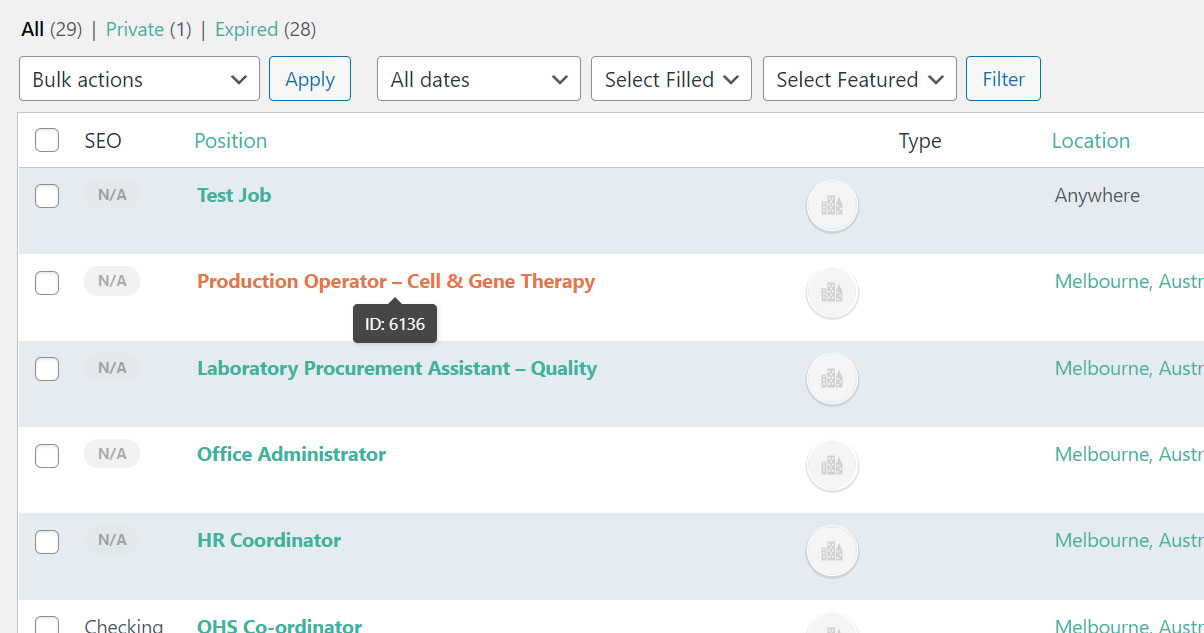
How to expire or fill a job
- View All Jobs by selecting either Job Listings on the main menu or All Jobs on the Job Listings sub-menu.
- Select the jobs you wish to expire or mark as filled by clicking the checkbox next to the job.
- Use the Bulk Actions menu to select your desired option.
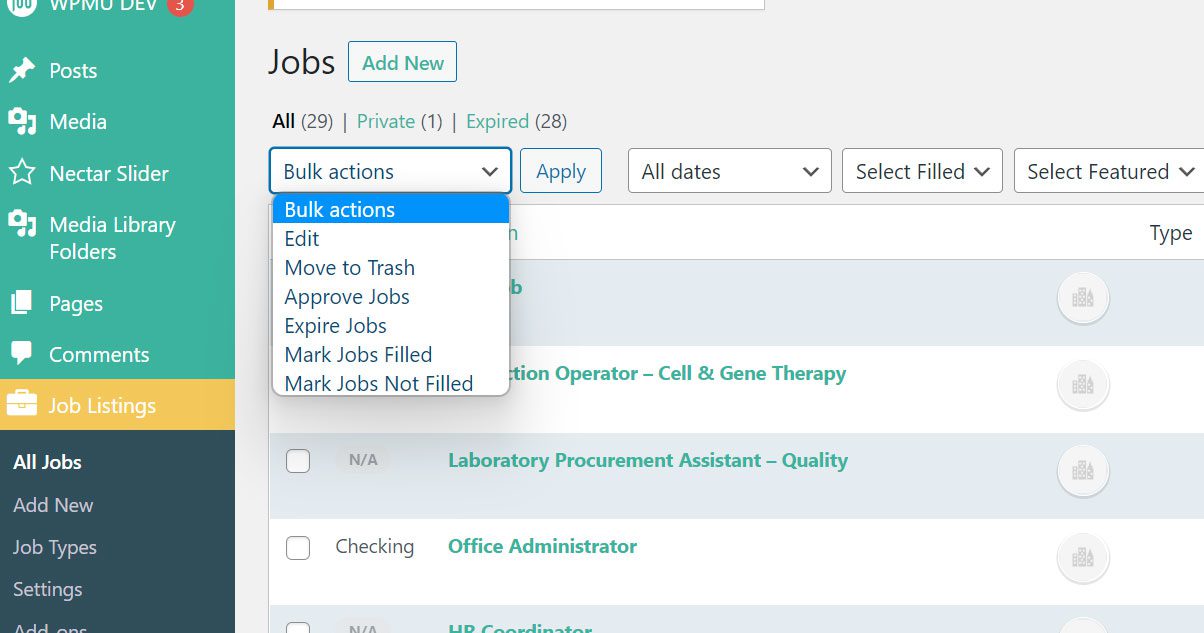
The Bulk Actions menu. This allows you to perform actions on multiple jobs at the same time by using the checkbox to the left of the job in the job list.
News and Blog Articles
Create and View News Articles or Posts
- Click on the Posts button on the WordPress left side menu.
- Hover over the Posts menu to bring up the sub-menu.
- Use the sub-menu to view all posts, add new Posts or create new categories.
- If you are already in the Posts dashboard use the Add New button.
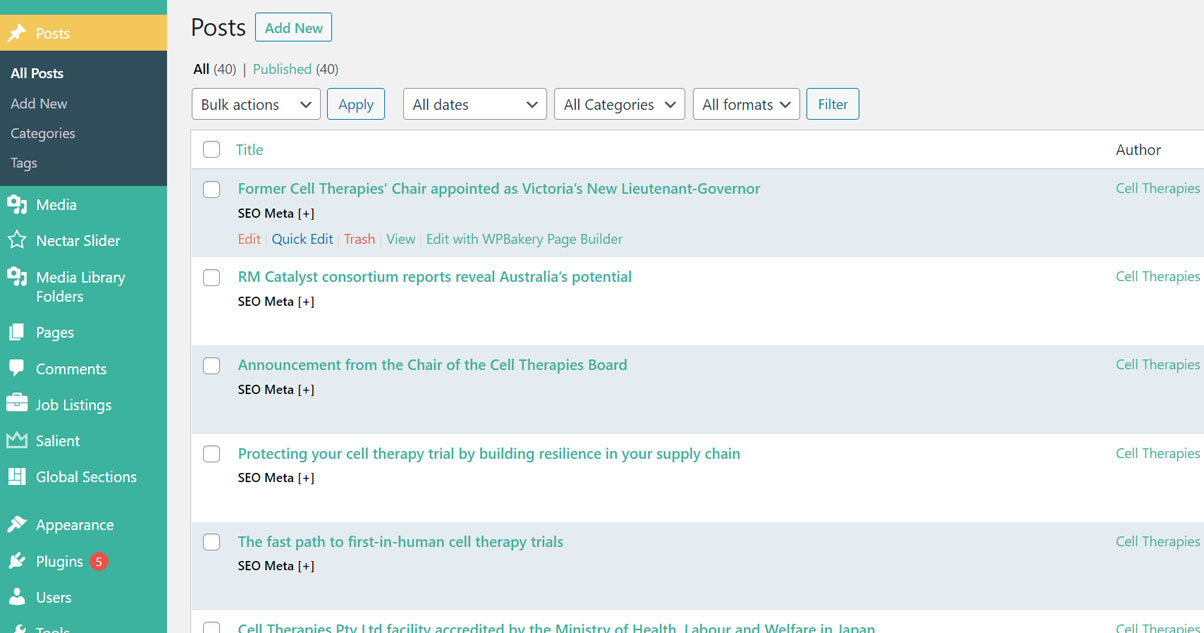
Hover for the Posts menu or click to open the Posts dashboard
Add a new Post by using the Add New button.
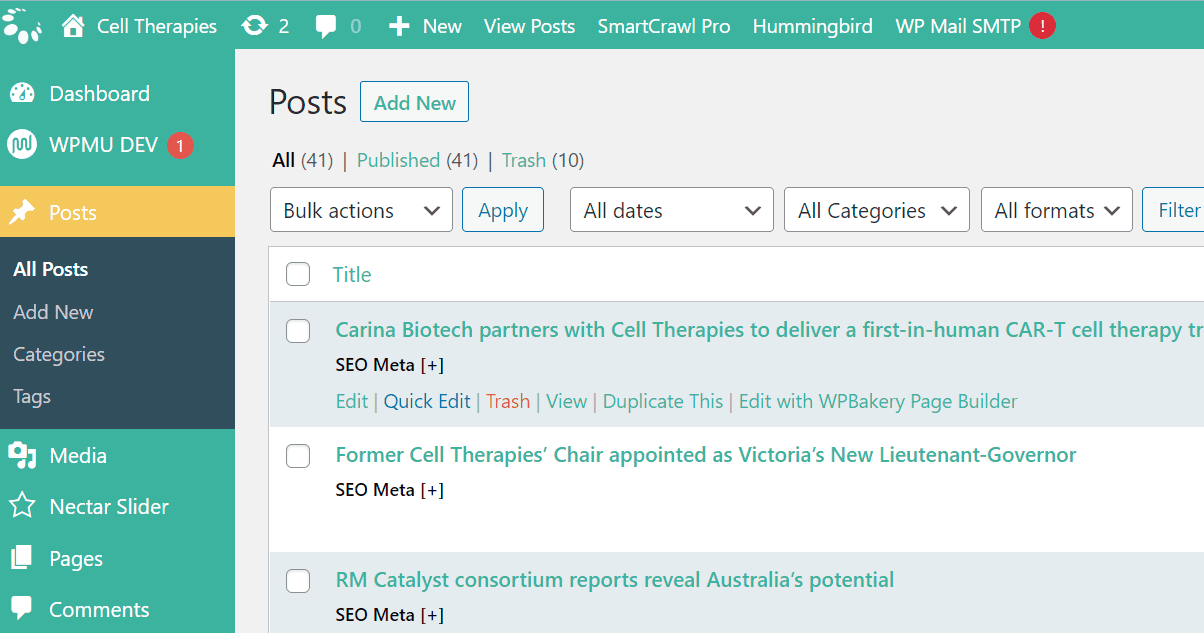
Access the individual posts menu by hovering over the post you wish to edit
How to use the Add New Post page
- Hover over the Posts button on the WordPress left side menu and select Add New from the submenu or use the Add New button from the Posts dashboard.
- Give your article a title. The URL will be automatically created for the article based on the title. If the title is “A great news article” then the url will become “/a-great-news-article”. Edit this title using the Edit button in the permalink section.
- Add the content of your article into the large text area.
- Select a Category from the Category section.
- Edit the Meta information of the article in the Smart Crawl Edit Meta section. This is the information that will appear on search engines when your article is shown.
- Add a Featured Image using the Set featured image link.
- Press the Publish Button to publish the article
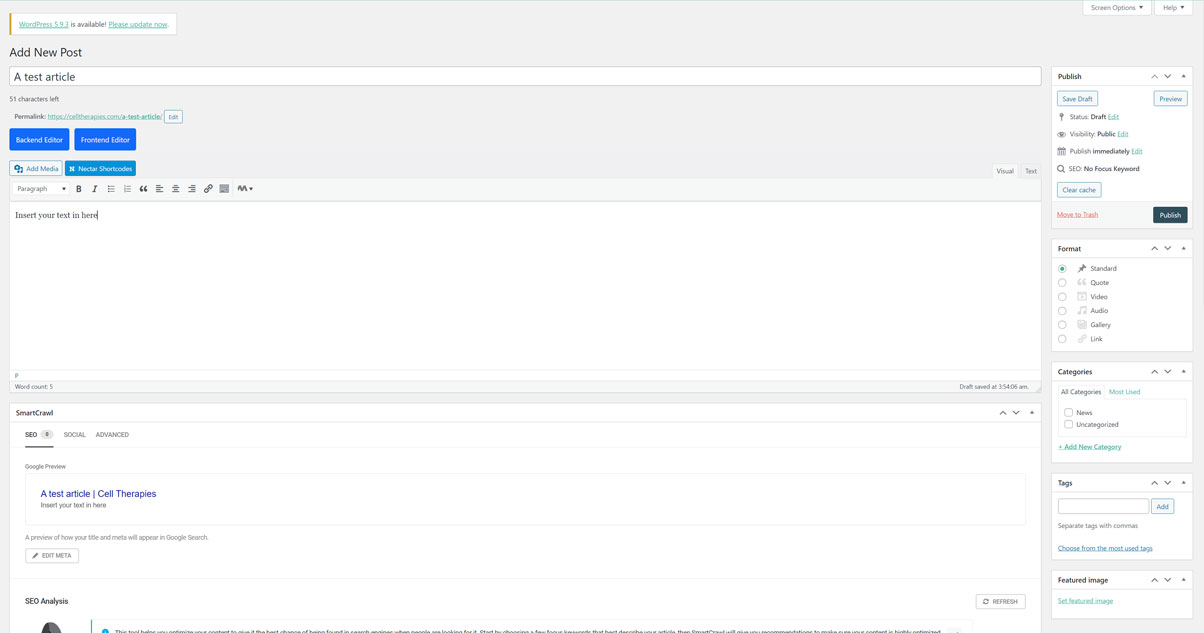
Enter a title for the article or post
Edit the URL of the article or post by pressing the edit button next to the permalink section. The URL cannot contain spaces.
Select a category for the article or post. News is usually the default choice.
Enter your article or post text into the large text box.
Edit the article or post meta data. This is the information that will appear in search engines.
Select a featured image for your article or post.
Use the Publish button to create the article on the live site.
Edit an existing article or post
- Head to Pages > All Pages to bring up the page list.
- Hover over the page that you want to edit and click the Edit link
Select Edit when hovering over the post